Guitar Pedals for Beginners: The 3 Essentials, Pedal Order & How to Use Them
Most “beginner pedalboard” advice is secretly written for people who already know what they like. This one isn’t. If you’re new to guitar pedals for beginners, you want two things: a setup that sounds good at home volume, and a chain you can understand without turning practice into troubleshooting.
This guide gives you the simplest path to good guitar effects pedals for beginners: what to buy first, a beginner-proof pedal order, and starter settings that work in a bedroom/small-room setup.
If you’re searching for the best guitar pedals for beginners, the goal is not a huge board—it’s a small setup you’ll actually use every day.
If you want one simple answer: Start with Tuner → One Gain Pedal (Overdrive or Distortion) → One Ambience Pedal (Reverb or Delay). That covers the “real life” sounds most people actually use.
The 60-second decision
If you’re shopping right now and you want the fastest correct direction, use this table. It’s designed for guitar pedals for beginners who play at home volume.
| Your situation | Buy this first | Then add | Why it works |
|---|---|---|---|
| Your amp/modeler already has effects you like | Tuner | One gain pedal (if your drive feels weak) | You avoid duplicates and spend money where you actually feel improvement |
| Your amp is mostly clean / dry (no good reverb or drive) | Gain pedal (OD or Dist) | Reverb (or Delay) | Drive gives “feel” first; ambience makes home playing sound bigger |
| You want rock/blues/indie crunch that cleans up | Overdrive | Reverb | Dynamics stay alive; you get usable crunch without turning to mush |
| You mainly want heavier riffs and saturated leads | Distortion | Noise control later (optional) | You get the core “aggression” first; you can tame noise later if needed |
| You’re not sure what you play yet | Tuner + Overdrive | Delay (or Reverb) | This combo stays useful even after you upgrade your amp or guitar |
Shortcut: If you’re asking “what is the best guitar pedal for beginners?” the most beginner-proof answer is usually a tuner (utility) plus one good gain pedal (feel). Everything else is optional.
If you only want the best first guitar pedal, start with a tuner—then pick one gain pedal based on your style.
Do you even need pedals yet?
Before you chase the best guitar pedals for beginners, check what your rig already covers.
- Practice amps & modelers: Many already include drive, reverb, delay and modulation. Pedals become useful when you want better feel, simpler control, and repeatable sounds without menu diving.
- Simple clean amps: If your amp is dry and clean, pedals can turn it into a flexible “platform” without needing loud volume.
- Home volume reality: At low volume, a pedal can give you satisfying sustain and clarity without forcing the amp into its loud sweet spot.
If your main struggle is just getting a satisfying sound at “don’t annoy the neighbors” volume, it’s worth fixing the base rig (amp, room, EQ) before you buy a giant board. This low-volume guitar tone guide walks through that step-by-step.
If you like your base sound but feel limited, a small beginner pedalboard makes sense. If you already love your amp’s built-in effects and drive, you can wait and spend later with more confidence.
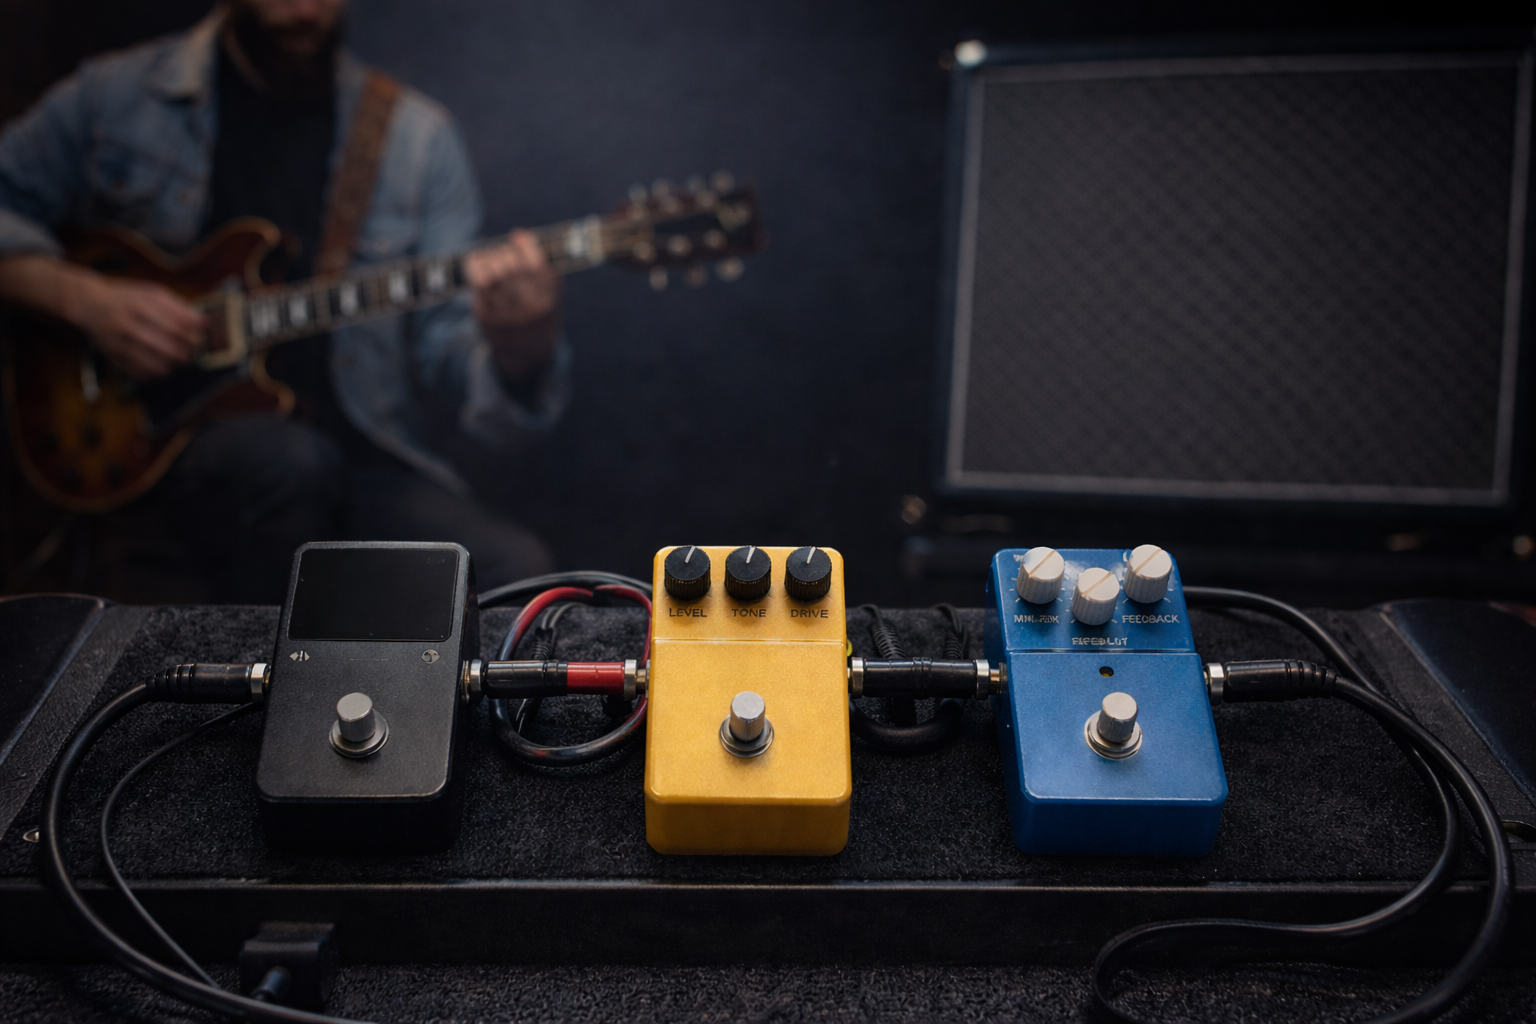
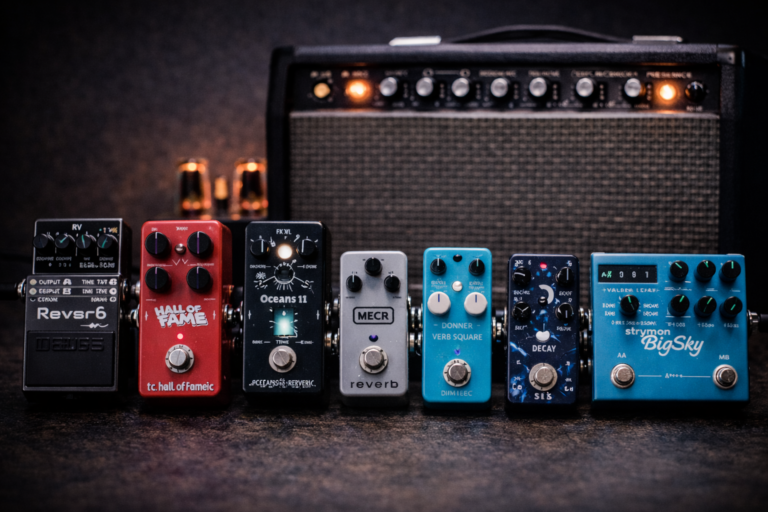
The 3 essential guitar effects pedals for beginners
Most “big boards” you see online are not a beginner requirement. For guitar effects pedals for beginners, these three categories cover almost everything you’ll actually use:
These are the best guitar effects pedals for beginners because they solve the biggest beginner problems first: tuning, core feel, and space.
- Tuner pedal (utility)
- One gain pedal (overdrive or distortion)
- One ambience pedal (reverb or delay)
1) Tuner pedal (the unsexy essential)
A tuner doesn’t “upgrade” tone, but it makes every other pedal worth hearing. Out-of-tune guitars make great gear sound cheap.
- Best for: everyone, especially home players who want fast sessions.
- Main watch-out: place it first so it sees a clean signal.
- Skip if: you never plug into anything and a clip-on is already reliable for your tuning style.
Beginner habit: Tune once, play 2 minutes, tune again. New strings and new hands drift more than you expect.
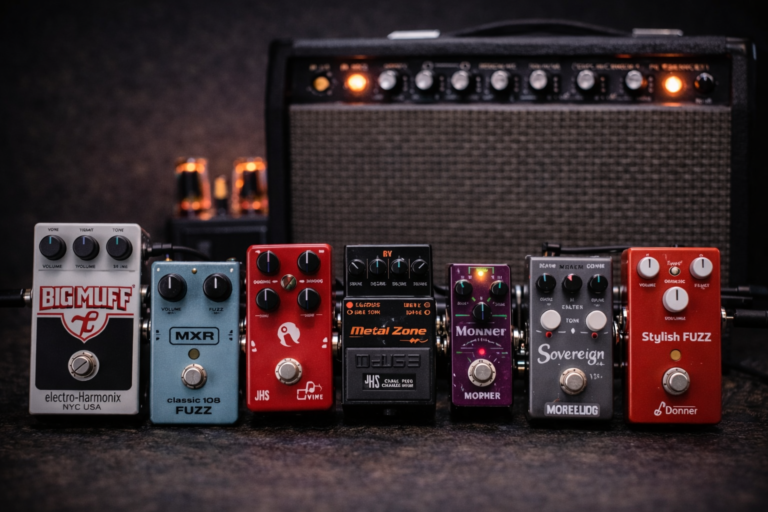
2) Gain pedal: overdrive vs distortion (beginner version)
This is the pedal that changes how the guitar “talks” under your fingers. For beginners, the key is choosing the right direction, not chasing the perfect model.
If you want a full breakdown of how overdrive, distortion, and fuzz differ, you can dive into this comparison: Overdrive vs Distortion vs Fuzz.
| Type | What it feels like | Best for | Beginner watch-out |
|---|---|---|---|
| Overdrive | Warm grit + dynamics; cleans up with guitar volume | Blues, classic rock, indie, “edge of breakup” | Too much drive at home volume can turn fizzy and tiring |
| Distortion | More gain + compression; tighter aggression | Heavier rock, metal, saturated leads | Noise and muddiness increase fast if you stack gain carelessly |
Simple rule (home players):
- If you want flexible crunch that still feels like your hands matter → start with overdrive.
- If you mainly want heavier riffs and “instant saturation” → start with distortion.
Starter gain settings (that won’t ruin your sound)
| Knob | Starter setting | What you’re listening for |
|---|---|---|
| Drive / Gain | 9–11 o’clock | “Bigger + warmer”, not “blanket of fuzz” |
| Tone | 11–1 o’clock | No ice-pick, no blanket. Adjust slowly. |
| Level / Volume | Match clean level (or slightly above) | Same loudness on/off so you judge tone honestly |
- Skip if: your amp/modeler already gives you a drive sound you genuinely love and can control easily.
- Better direction: if your main problem is “dry, boring sound” rather than “not enough gain”, buy ambience first.
Once you have your basic drive sound sorted, a dedicated fuzz pedal is a fun way to add wilder, more sustaining textures on top of your main tone.
3) Ambience pedal: reverb or delay
Ambience is where your tone stops feeling like “guitar in a dry room” and starts feeling like a real part in a song. For good guitar pedals for beginners, one ambience pedal is enough for a long time.
| Choose | If you mostly… | It gives you… | Beginner watch-out |
|---|---|---|---|
| Reverb | Play alone, clean/light crunch | Depth and “room” that you miss when it’s off | Too much mix turns to wash and hides mistakes |
| Delay | Play leads, riffs, solos over tracks | Thickness + space; repeats that make parts feel bigger | Too much feedback clutters timing fast |
Still not sure whether reverb or delay should be your first ambience pedal? This side-by-side guide walks through the tradeoffs in more detail: Delay and Reverb Pedal Explained.
Starter ambience settings
- Reverb: mix 10–20%, decay mid. You want “space”, not “special effect”.
- Delay: 300–450 ms, mix 10–15%, repeats 2–3. Enough to feel thicker, not enough to step on your playing.
- Skip if: your amp already has reverb/delay that you actually use and like.
- Better direction: if your core tone feels flat and stiff, gain first often improves “feel” more than ambience.
Beginner pedal order (simple chain that just works)
For most guitar pedals for beginners setups, this is the clean, reliable chain:
Guitar → Tuner → Overdrive/Distortion → (Modulation) → Delay/Reverb → Amp
| Position | Pedal | Why it’s here |
|---|---|---|
| 1 | Tuner | Tracks best with a clean signal; easy muting |
| 2 | Gain (OD/Dist) | Shapes your core tone; everything after is “coloring” |
| 3 (optional) | Modulation | Sounds fuller after drive in most basic rigs |
| Last | Delay/Reverb | Add space to a finished tone (cleaner and easier to control) |
Beginner-safe rule: If something sounds messy, don’t change the whole chain. Lower gain first, then match volumes, then adjust tone/EQ.
How to use guitar pedals for beginners (without getting lost)
If you’re learning how to use guitar pedals for beginners, treat pedals like small, controlled choices—not magic boxes.
- Start with one pedal at a time: set your amp sound first, then add pedals one-by-one.
- Always A/B test: compare pedal off vs on at the same loudness.
- Match volumes: louder always feels “better” at first. Don’t let volume trick you.
- Use less gain than you think: at home volume, too much gain becomes fizz + fatigue.
- Save settings you love: write down 2–3 “home settings” so each session starts fast.
If you want a more structured process for dialing in a usable bedroom tone before you even think about extra pedals, you can combine this guide with the dedicated low-volume guitar tone guide and the quick-reference guitar EQ cheat sheet.
Practical tip: If your tone gets harsh when you add drive, lower gain slightly and adjust tone in small steps. Most beginners fix harshness by adding gain (which usually makes it worse).
Two smart pedals to add later
After the essentials, these are the most useful “next steps” for home players. Add them only if you feel a real gap.
4) Modulation (chorus, phaser, tremolo)
Modulation adds movement and texture. Used subtly, it makes simple parts feel more “record-like” without turning into a cartoon effect.
- Chorus: width and thickness (great on cleans and light crunch).
- Phaser: a sweeping movement that can fit riffs and arpeggios.
- Tremolo: rhythmic volume pulsing (vibey, simple, musical).
- Skip if: you mostly play high-gain where modulation isn’t part of your sound.
- Better direction: looper if your main goal is improving timing and practicing leads over rhythm.
5) Looper or boost (choose your purpose)
- Looper: record rhythm parts and practice lead, timing, and phrasing. One of the fastest “practice upgrades” you can buy.
- Boost: a simple lift for solos, especially when playing over backing tracks.
If you’re unsure: a looper usually improves your playing more than buying a second gain pedal.
Common beginner mistakes (and quick fixes)
- Too much gain: lower drive first, then raise level if needed. Clarity beats saturation at home volume.
- Volume mismatch: match pedal on/off loudness so you judge tone, not volume.
- Harsh tone “fix” by adding gain: do the opposite—reduce gain, then tweak tone a hair darker.
- Messy chain changes: change one thing at a time. Otherwise you never learn what caused the improvement.
- Noise from cheap power: if you hear hum/whine, power and cables are often the real issue.
If harsh or fizzy tone at bedroom volume is your main problem, start by fixing the base sound before blaming the pedals. The low-volume guitar tone guide shows how to set up the rig itself, and the guitar EQ cheat sheet gives you a simple map for taming harsh highs and boomy lows.
Buying checklist (don’t skip this)
If you want a beginner pedalboard that feels “clean” and reliable, these details matter more than most people expect.
- Power: confirm whether the pedal uses standard 9V center-negative. Avoid random adapters if you can.
- Patch cables: a few decent patch cables beat buying another pedal you don’t need.
- Start small: 2–3 pedals is enough to learn what you actually like.
- Return policy: beginners change taste fast—flexibility is part of smart buying.
- Space: if you’re not using a board yet, keep pedals spaced so you don’t hit two switches by accident.
Best guitar pedal brands (quick guide)
If you’re comparing “budget vs trusted”, focus on consistency and reliability—especially as a beginner. The goal is a pedal that works every time, not a pedal that forces you to troubleshoot.
- What to look for: solid footswitch feel, low noise at reasonable gain, clear controls, and stable power behavior.
- Safe mainstream picks: brands that are widely used and generally consistent across many models.
- Budget reality: cheaper pedals can be great, but quality varies more from unit to unit—buy from a place with easy returns.
Beginner priority: one reliable pedal you learn deeply beats three cheap pedals you keep replacing.
FAQ
What are the best guitar pedals for beginners?
For most home players, the most useful “first board” is tuner + one gain pedal (overdrive or distortion) + one ambience pedal (reverb or delay). That covers the core sounds you’ll actually use without turning practice into gear management.
What are the best guitar effects pedals for beginners?
The most useful beginner setup is a tuner, one gain pedal (overdrive or distortion), and one ambience pedal (reverb or delay). It’s the simplest way to cover real sounds at home volume while keeping the board easy to learn.
What should my first guitar pedal be?
If you have no pedals at all, start with a tuner. If you want your first “tone” pedal, the most beginner-proof answer is a good gain pedal (feel). Pick based on your style: overdrive for flexible crunch and dynamics, distortion for heavier saturation.
How many pedals do beginners really need?
A practical starting point is just three: Tuner → Gain (OD/Dist) → Reverb or Delay. That covers the core sounds you’ll actually use; everything else (modulation, looper, boost) is a “nice to have” you can add later if you feel a specific need.
Should beginners buy pedals or a better amp first?
If you hate your basic amp sound or it can’t get loud enough to feel good, upgrading the amp or modeler usually makes more difference. If you already like your base tone but want more feel and space at home volume, a small pedal setup (tuner + gain + ambience) is often the smarter first move.
What is the best beginner pedal order?
A simple, reliable chain is Guitar → Tuner → Overdrive/Distortion → (Modulation) → Delay/Reverb → Amp. This keeps your core tone early and your space effects last, which is easier to control.
About this guide
- Who it’s for: beginners building a first pedal setup for home/bedroom volume.
- Who wrote it: a home guitar player who actually tested these chains on small practice amps and modelers at real bedroom volume, not just on spec sheets.
- How we think about “best”: low hassle, easy control, repeatable results, and learning value.
- What this guide is not: a giant shopping list or a “buy 10 pedals” board plan.
- Last updated: 2026-01-01
One Comment