Guitar Pedalboard Explained: Basic Pedalboard Setup for Beginners
A guitar pedalboard looks simple from a distance: a flat board with a few stompboxes and cables. In practice, it’s where your pedals, power and signal chain finally come together in a way you can use every day. For home players especially, a tidy board can be the difference between actually practising and constantly fighting a mess of cables on the floor.
This guitar pedalboard explained guide is a practical look at the modern guitar pedalboard – not a shopping list of “must-have” pedals, but a step-by-step way to understand what a pedalboard does, what a basic pedalboard setup for beginners looks like, and how to grow it without wasting money. I’ve gone from a single DIY board with three pedals to more complex setups for home and rehearsals, and the same patterns keep showing up.
- What a guitar pedalboard actually is and who really needs one.
- Typical pedalboard setup order and simple starter layouts.
- Pedalboard ideas for different budgets and playing situations.
- How to make your own pedalboard and basic pedalboard building tips.
What is a guitar pedalboard?
At the most basic level, a guitar pedalboard is a platform that holds your pedals in a fixed layout, powers them and keeps the cabling tidy. Instead of placing individual stompboxes directly on the floor every time you play, you mount them to a board once and treat them as a single piece of gear.
A simple guitar pedalboard usually includes:
- A flat board, frame or case (wood, metal or plastic).
- Velcro or other mounting system to secure pedals.
- A power supply (daisy chain or isolated) to feed the pedals.
- Short patch cables to connect the pedals in series.
- Input and output points for guitar and amp / audio interface.
The goal is not to be fancy – it’s to make your everyday rig consistent and fast to set up. Once a board is dialled in, you spend less time plugging things in and more time actually playing.
Who actually needs a pedalboard?
You don’t have to own a pedalboard the moment you buy your first overdrive. Many players stay happy with one or two pedals on the floor for a long time. A dedicated board starts to make sense when:
When a pedalboard makes sense
- You use more than two or three pedals regularly and are tired of rewiring them.
- You carry your pedals to rehearsal or gigs and want a faster setup and teardown.
- You’re building a consistent sound and want your pedal order to stay the same.
- You want a cleaner workspace at home, without cables everywhere.
When a pedalboard is probably optional
- You only use a single multi-effects unit or amp modeler.
- You own one or two pedals and don’t mind setting them up each time.
- You’re still deciding whether you even like using individual pedals.
If you’re not sure yet, you can run a tiny “floorboard” with one or two pedals and a simple daisy-chain power supply before investing in a full guitar pedalboard.
Basic pedalboard setup for beginners
A pedalboard setup for beginners doesn’t need to be complicated.
The aim is to support how you actually play right now: maybe clean and light drive for home practice and a bit of ambience you actually use.
A realistic basic pedalboard setup might include:
- One main drive (overdrive or distortion) for rhythm and leads.
- Optional modulation (chorus, phaser, etc.) if you actually use it.
- Delay and/or reverb for space and sustain (a simple delay and reverb pedal combo can cover most ambient needs).
If you’re not sure what those ambience effects actually do, this explainer on what a delay pedal does and the broader delay and reverb pedal guide are a good warm-up. And if you’re still choosing your first few stompboxes, the broader guitar pedals for beginners guide helps you decide which effects belong on your first board.
Typical pedalboard setup order
There is no single correct signal chain, but there is a typical pedalboard setup that works well for most players. Think of it as a starting point you can tweak later.
A common order from guitar to amp looks like this:
- Input / buffer. Any buffer or always-on utility at the very front of the chain.
- Filters and pitch. Wah, auto-wah, pitch shifters.
- Dynamics. Compressor, clean boost.
- Gain. Overdrive, distortion, fuzz and other drive pedals.
- Modulation. Chorus, phaser, flanger, tremolo.
- Ambience. Delay, then reverb.
This order keeps the “shaping” effects closer to the guitar and the “space” effects towards the end. Once you know what a normal chain feels like, you can experiment with swapping certain pedals to see how it changes your sound. If you only have three or four pedals, you can simply follow: drive → modulation → delay/reverb and ignore the rest for now.
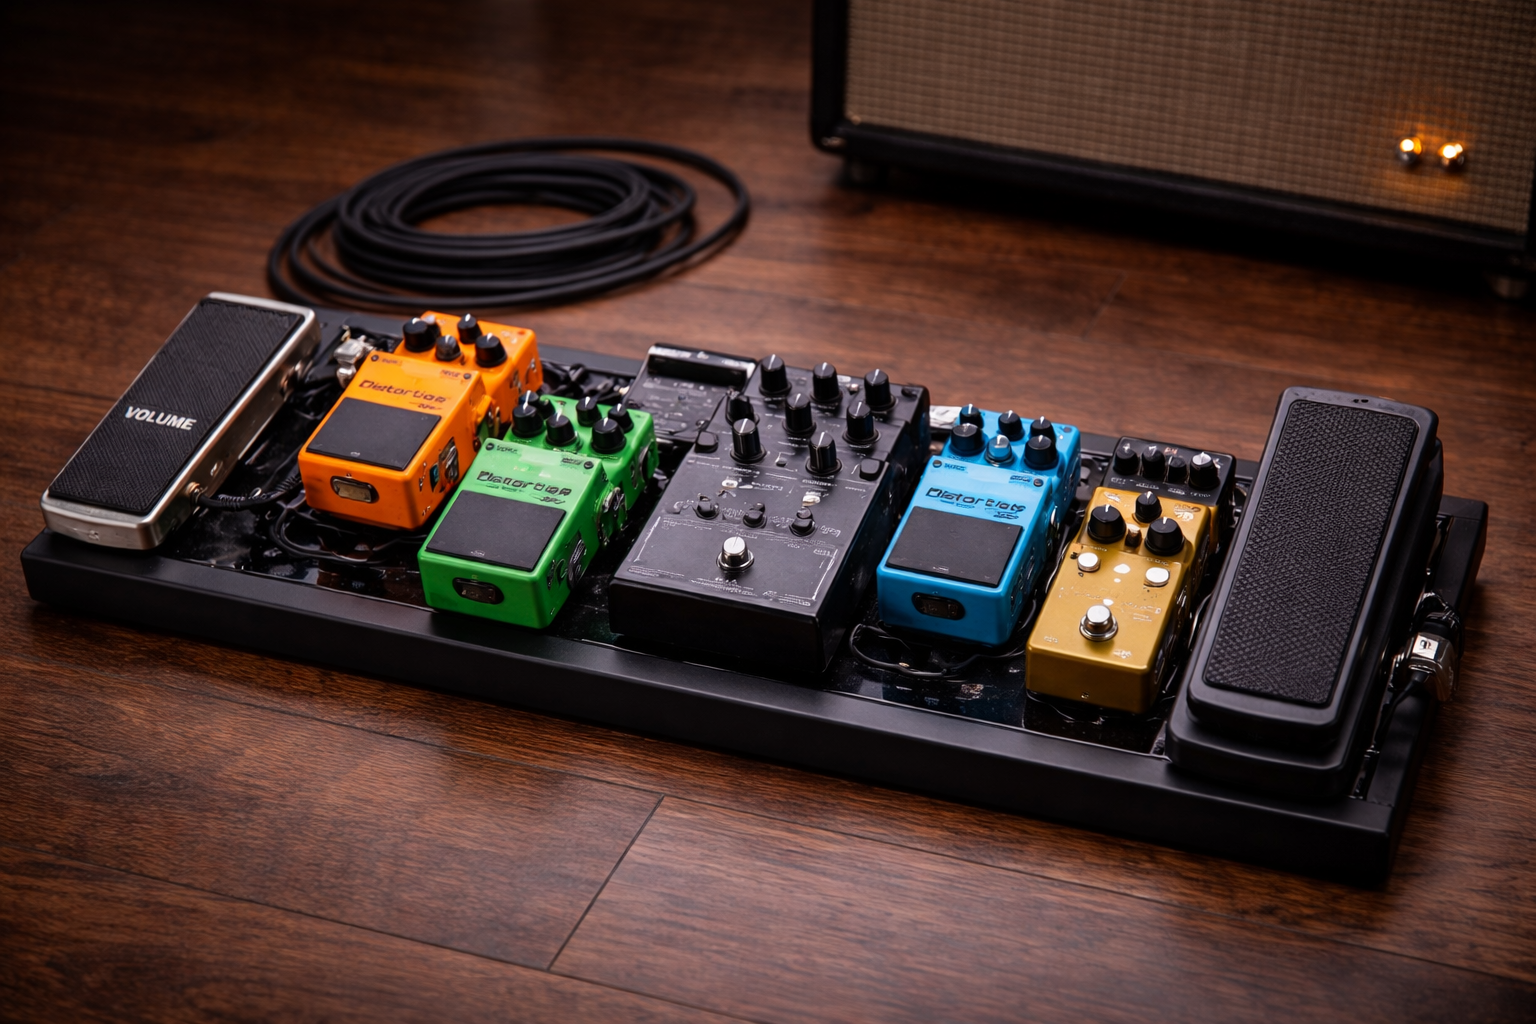
Pedalboard ideas for real-world rigs
Most players don’t need a giant touring board. The best pedalboard ideas are simple layouts that match how much you actually play and where. Here are three practical examples.
| Pedalboard type | Typical chain | Best for |
|---|---|---|
| Minimal home practice pedalboard | Overdrive/distortion → delay or reverb | Bedroom players who want one main gain sound and a bit of ambience without a big board. |
| Compact rehearsal and jam pedalboard | Low-gain OD → higher-gain drive or fuzz → modulation → delay → reverb | Small band rehearsals and jam sessions where you need separate rhythm, lead and ambient sounds. |
| Hybrid pedalboard with multi-effects | Standalone drive pedal → multi-effects (modulation + delay + reverb) | Players who want one or two “feel” pedals plus a compact unit to cover the rest of the effects. |
1) Minimal home practice pedalboard
This layout is for players who mainly practise at home at moderate volume.
Chain example: Guitar → Overdrive / Distortion → Delay or Reverb → Amp / Modeler
- Overdrive or distortion → delay or reverb.
- Small flat board or even a DIY wooden plank.
- Single daisy-chain power supply if the pedals don’t draw much current.
The idea is to keep the board tiny and focused: one main gain sound and one ambience effect you actually use.
2) Compact rehearsal and jam pedalboard
For band practice and small gigs, it helps to add a bit more control.
Chain example: Guitar → Low-gain Overdrive → Higher-gain Drive / Fuzz → Modulation → Delay → Reverb → Amp
- Low-gain overdrive → higher-gain drive or fuzz → modulation → delay → reverb.
- Pedalboard with a proper handle or soft case for transport.
- Better power supply with isolated outputs to reduce noise.
This is still a simple guitar pedalboard, but it gives you separate tones for rhythm, lead and ambient parts.
3) Hybrid board with multi-effects
Some players prefer a small multi-effects unit plus a couple of favourite stompboxes.
Chain example: Guitar → Standalone Drive Pedal → Multi-effects (Mod + Delay + Reverb) → Amp / FRFR / Interface
- Standalone drive pedal → multi-effects for modulation and ambience.
- Flat board sized to the multi-effects unit, with one or two extra spots.
- Single power strip on the board to feed all devices.
This kind of layout keeps your “feel” pedals (like your main drive) separate while letting the multi-effects handle the rest.
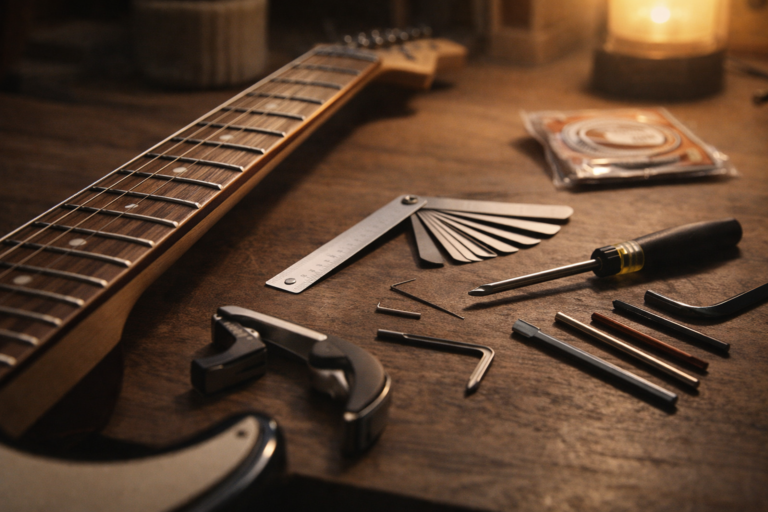
How to make your own pedalboard
Ready-made boards are convenient, but you can absolutely build a simple DIY guitar pedalboard if you like working with tools or want to save some money. The goal isn’t to create a museum piece – it’s to support your basic pedalboard setup without falling apart.
A straightforward way to make your own pedalboard:
- Measure the footprint of your pedals in a layout you like.
- Cut a wooden plank or plywood panel slightly larger than that layout.
- Sand sharp edges, then paint or seal the wood if you want durability.
- Attach rubber feet underneath so the board doesn’t slide.
- Cover the top with hook-side Velcro, and the pedal bases with loop-side.
- Route power cables and patch cables along the sides or under the board.
You can get fancier with angled frames, lightweight aluminium or integrated patch bays later. For a first build, simplicity beats perfection – focus on stability and access to the switches. My first DIY board was literally a painted plank with Velcro, and it still worked far better than a pile of loose pedals on the floor.
Pedalboard building tips: power, cables and noise
Good pedalboard building tips are less about clever tricks and more about preventing common problems.
Most noise, hum and frustration comes from power and cabling, not from the board material itself.
- Plan the power first. Check how much current each pedal needs and whether it prefers isolated power. A daisy chain can work for a small, quiet board; larger rigs benefit from isolated outputs.
- Keep cable runs short and tidy. Use patch cables that are just long enough to reach. Excess cable length is an easy way to add noise and clutter.
- Label in and out. Mark the input and output sides of the board so you can plug in quickly in a rehearsal room or on a dim stage.
- Test one pedal at a time. When wiring your guitar pedalboard for the first time, add pedals one by one and check for hum or loss of tone after each step.
- Think about future pedals. Leave a little physical space and a spare power output or two if you know you’ll add more effects later.
If your board is quiet but your tones still fall apart at volume, tightening your gain staging with the basics in gain vs volume vs master often does more than buying another pedal.
When a pedalboard is overkill
Sometimes the best move is to delay buying (or building) a pedalboard. You might be happier focusing on your core rig first if:
- You’re still not satisfied with your clean and basic driven tones.
- You mostly practise through headphones or a simple amp modeler.
- You find yourself tweaking pedals more than playing songs.
If your sound feels rough even before pedals, it’s worth fixing the basics first – this breakdown of why your guitar can sound bad at home and the practical steps in the beginner guitar checklist will usually move the needle more than a new board.
Summary: putting together your first guitar pedalboard
If you’re building your first pedalboard setup for beginners, start with the basics: one or two gain pedals and a delay or reverb you actually use. Mount them on a simple board, keep the power and cabling tidy, and live with that layout for a while before expanding.
From there, you can try different pedalboard ideas, experiment with typical and unusual pedal orders, and decide whether a DIY solution or a commercial board suits you better. Once you’ve worked through this guitar pedalboard explained guide, the board should feel like a tool that serves your playing, not the other way around.
Guitar pedalboard FAQ
Do I really need a pedalboard if I only have a few pedals?
Not necessarily. If you own one or two pedals and don’t move them around much, you can happily run them on the floor with a basic power supply. A pedalboard starts to pay off once rewiring your pedals feels annoying or you’re transporting them regularly.
Is it cheaper to make your own pedalboard?
A simple DIY board made from wood and Velcro is often cheaper than a branded metal frame, especially if you already have tools. However, once you factor in time, paint, hardware and a case, the price difference can shrink. If you enjoy building things, DIY is rewarding; if not, buying a ready-made board may be worth it.
What size guitar pedalboard should I buy?
A good rule is to plan for the pedals you actually own plus space for one or two future additions. Oversized boards can be bulky to carry and tempt you to buy pedals you don’t truly need. Undersized boards force awkward layouts and messy cabling. Lay your pedals out on the floor first, measure that footprint, then choose the next-up board size.
Can I break the typical pedalboard setup order?
Yes. The “standard” order is just a starting point. Some players prefer delay before drive, modulation before fuzz, or compression later in the chain. Once you understand why the usual order works, feel free to experiment – just change one thing at a time so you can hear what’s actually happening.