Guitar Neck Relief: Measure It Before Touching the Truss Rod
Guitar neck relief is the small amount of forward curvature that gives vibrating strings clearance over the middle frets. It is not the same thing as action, and the truss rod is not a general “lower the strings” control.
That distinction matters because a surprising number of setup problems get diagnosed backwards. A guitar feels high, so the truss rod gets tightened. A few frets buzz, so more relief gets added. Then the bridge is changed to compensate for what the neck adjustment did, and the setup turns into a chain of corrections.
This guide treats relief as geometry: how to measure it repeatably, what symptoms too much or too little relief can create, how string gauge and tuning alter the load on the neck, and when the correct answer is do not touch the truss rod.
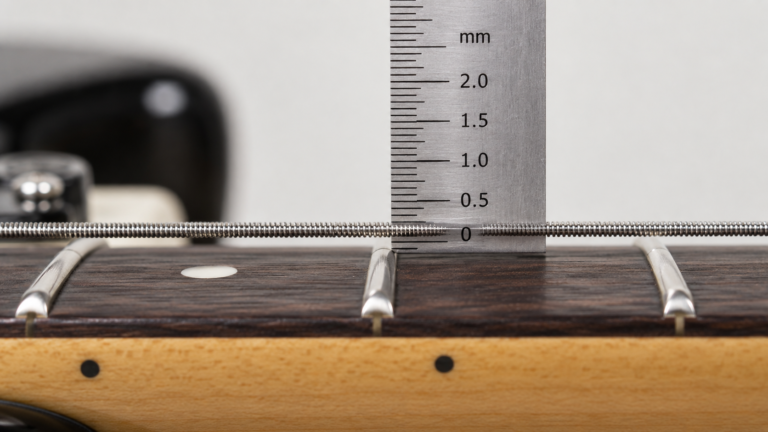
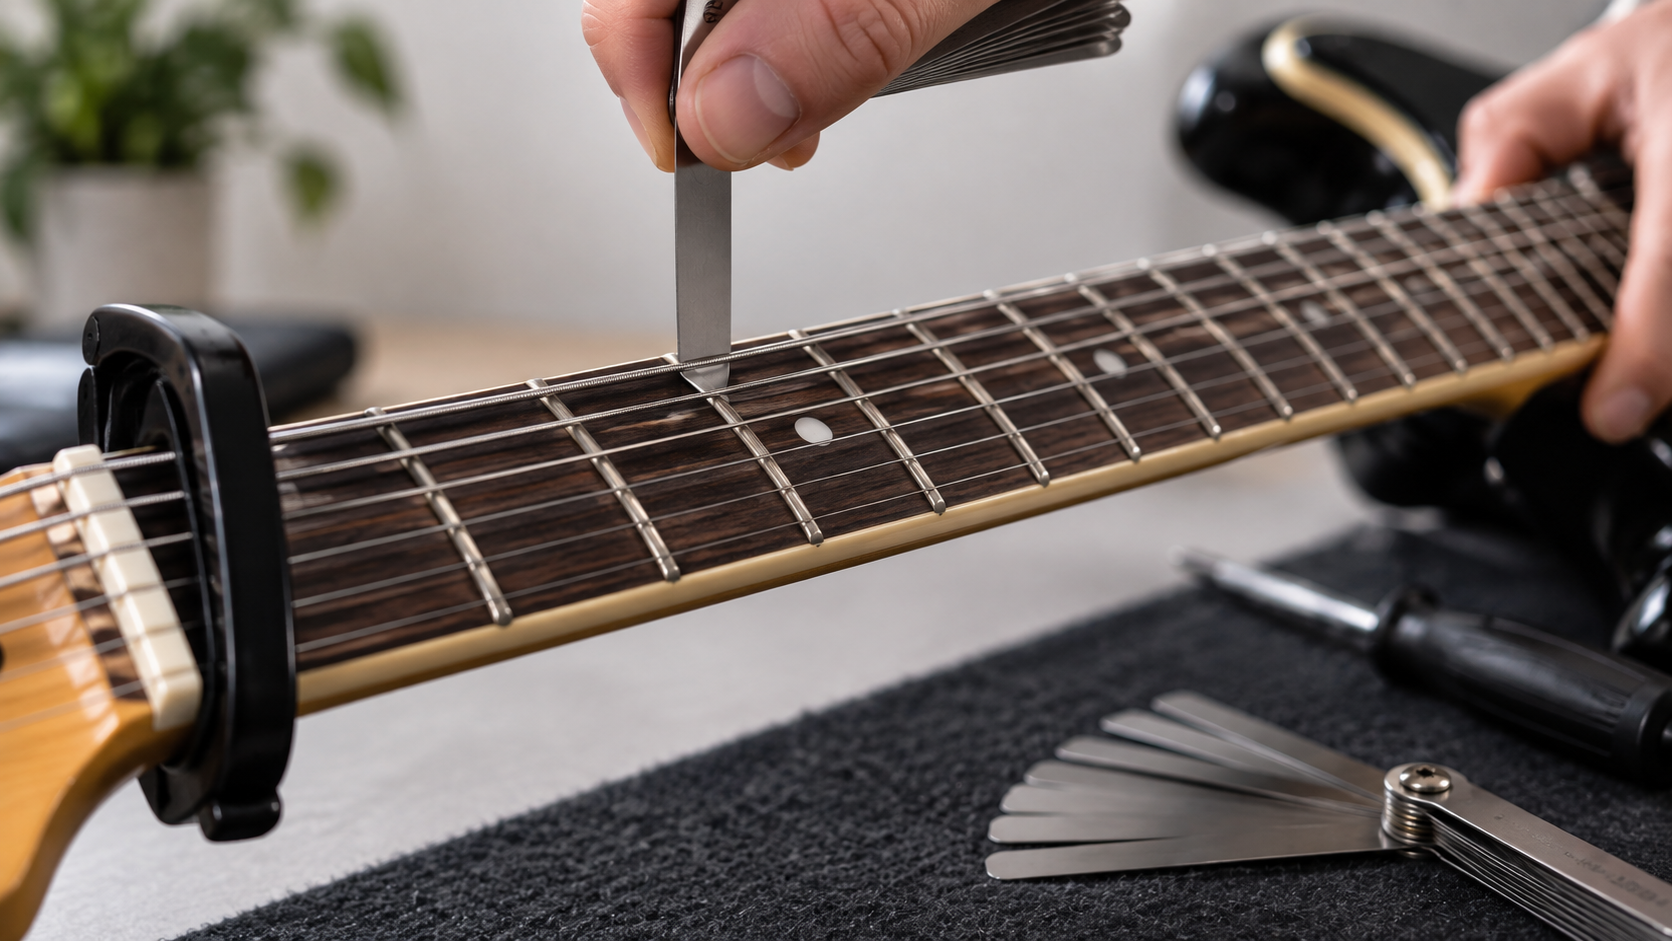
The string becomes the straightedge; the gap shows the neck’s curvature
What neck relief actually is
Under string tension, a guitar neck is a beam under load. The strings pull it forward. The truss rod counteracts some of that load. The final neck shape is the result of the wood, construction, rod tension, string tension, humidity and temperature working together.
A perfectly straight neck is not automatically ideal. Strings vibrate in an arc-like envelope, and the middle portion of the speaking length needs clearance over the frets. Relief creates some of that clearance without forcing the entire bridge higher.
The useful target is not “as straight as possible.” It is “as little relief as the guitar and player can use without unwanted fret interaction.” That target changes with playing attack, fret quality, scale length, tuning and string gauge.
How to measure guitar neck relief
The most repeatable method turns the string itself into a straightedge.
Fender’s current electric-guitar setup procedure uses a capo at the first fret, the sixth string held at the last fret, and a feeler-gauge check at the 8th fret. See Fender’s setup guidance.
Which fret should you measure relief at?
Different setup methods use the 7th, 8th or a nearby fret because the deepest part of the relief curve sits around the middle of the supported span. The exact reference matters less than consistency when you are comparing your own adjustments.
If you are following a manufacturer spec, use the manufacturer’s measurement location. Do not take a 7th-fret reading and compare it to an 8th-fret specification as if they were identical.
Use the smallest blade that actually fits the target method, keep the string lightly supported rather than lifting it, and avoid forcing a thick blade under the string because that changes the geometry you are trying to measure.
Neck relief vs action: two different measurements
Relief describes neck curvature. Action describes the string height above the frets at a chosen reference location. One influences the other, but they are not interchangeable.
Use relief to answer:
- Is the neck too concave?
- Is the neck too straight or back-bowed?
- Is middle-fret clearance sensible?
Use action to answer:
- How high are the strings above the frets?
- How high are the bridge saddles effectively setting the playing surface?
- Does the bass side need more clearance than the treble side?
For the actual string-height measurement, use our guitar action gauge guide. The critical point is sequence: relief should be checked before final action because changing neck curvature can change the action reading.
Too much relief vs too little relief: symptom patterns
| Symptom | Possible relief relationship | What else could cause it |
|---|---|---|
| Action feels high mainly through the middle frets | Too much forward relief is plausible | Bridge height, nut height, neck angle |
| Buzz on several lower/middle frets | Too little relief or back-bow is plausible | High frets, low action, aggressive attack |
| Buzz only at one fret / one small area | Relief is less likely to be the root cause | High fret, fret wear, local neck irregularity |
| Open-string buzz | Relief may contribute, but do not assume | Nut slot depth, loose hardware, first-fret geometry |
| High-fret choking on bends | Relief is usually not the only variable | Fret radius, action, fret level, neck geometry |
If the symptom is buzz, our fret buzz guide separates relief problems from fret, nut and hardware causes.
How string gauge, tuning and climate change relief
Relief is a force-balance problem, so changing string tension changes the load on the neck.
Moving to heavier strings at the same tuning generally increases tension and can pull more forward relief into the neck. Dropping tuning can reduce tension and allow the truss rod to pull the neck straighter. The exact amount depends on scale length, construction and the specific string set.
That is why a guitar that was stable on 9–42 in E Standard may need a relief check after moving to 11s or a substantially different tuning. Our guitar string gauge guide covers the feel and tension side of that decision.
Wood also responds to humidity and temperature. Seasonal movement can change relief without any hardware “failing.” If a guitar needs a small seasonal correction, that is not automatically a defect. If it constantly moves far outside normal adjustment or the rod seems ineffective, that is a different problem.
What the truss rod actually changes
The truss rod changes the neck’s resistance to the string load and therefore changes curvature. On many conventional single-action arrangements, tightening the rod reduces forward relief while loosening it allows string tension to create more relief. Some designs are dual-action and can actively move the neck in both directions.
Because designs differ, follow the instrument manufacturer’s direction before turning anything. Fender’s standard guidance, for example, describes clockwise adjustment as reducing excessive relief and counter-clockwise adjustment as allowing more relief on the relevant standard systems.
Do not chase a large visual change in one move. Work in small increments appropriate to the instrument, keep checking tuning and the measured gap, and stop if the truss rod meets abnormal resistance or the adjustment has no meaningful effect.
The point is not fear; it is measurement discipline. The truss rod is a normal setup component, but forcing a resistant rod is not a setup technique.
Problems the truss rod cannot fix
This is the section that prevents the most bad setups.
High or uneven frets
A local fret problem creates local symptoms. Adding relief moves the whole neck curve and may simply make the rest of the guitar worse.
Nut slots cut too low
Open-string buzz often persists even when the rest of the action rises. The nut is a separate geometry point.
Wrong neck angle
If bridge adjustment reaches its practical limit, neck angle or construction geometry may be the real problem.
Twist or complex neck deformation
A truss rod primarily controls longitudinal curvature. It cannot magically level a twisted fret plane.
Correct electric-guitar setup order
Setup variables interact. Use an order that prevents you from correcting the same problem twice.
If you are learning guitar maintenance from scratch, the beginner guitar checklist gives a wider ownership baseline without turning every adjustment into a luthier project.
Guitar neck relief FAQ
How do I measure guitar neck relief?
Tune the guitar, capo the first fret, hold the low E at the last fret, then use a feeler gauge to measure the gap between the string and a middle fret such as the 7th or 8th, depending on the method you are following.
Is neck relief the same as action?
No. Relief is neck curvature. Action is string height above the frets at a chosen measurement point. Relief affects action, but the two should be measured separately.
Can I lower action by tightening the truss rod?
Reducing excessive relief can lower the middle-fret action, but the truss rod should not be used as a substitute for bridge-height adjustment when the relief is already correct.
How much neck relief should a guitar have?
There is no universal number for every instrument. Use the manufacturer’s reference as a starting point, then account for fret condition, string gauge, tuning and playing attack.
How often should neck relief be adjusted?
Only when measurement and symptoms justify it. String changes, tuning changes and seasonal movement can alter relief, but routine adjustment for its own sake is unnecessary.
When should I stop and take the guitar to a technician?
Stop if the rod has unusual resistance, an adjustment produces no meaningful change, the neck appears twisted, the guitar needs repeated large corrections, or you are unsure about the instrument’s truss-rod design.
How this guide was built: the measurement sequence and relief logic are cross-checked against current Fender setup documentation. Manufacturer specifications are starting references, not universal targets; the final setup still depends on the individual guitar and player.